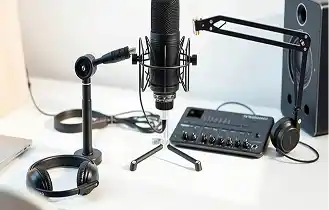

You don't need a $10,000 studio to sound like one. After coaching thousands of podcasters, we've found that bad audio ruins more shows than bad content. Listeners will forgive a dry topic — they won't forgive bad audio.
Why Audio Quality is a Growth Lever
Listeners are ruthless. They make a decision to stick around or leave in the first 10 seconds of hitting play. If your audio has an echo, sounds like a phone call, or has distracting background noise, they're out. Before you even have a chance to hook them.
The good news? Today's audio tools are incredibly powerful and easy to use. Most of the heavy lifting can be done with a few clicks. With 90% of beginner podcasters making the same mistakes, mastering a few settings instantly puts your show ahead of the pack.
The 5 Settings to Adjust Today
1. Gain Staging
Gain staging is about setting the right input level before any processing happens. If your input is too hot, everything downstream clips. Too low, and you introduce noise when you boost later.
- Set your interface preamp so your voice peaks around -12dB to -6dB
- Avoid the red — clipped audio cannot be fixed in post
- Record a test and review your levels before recording your episode
2. Noise Gate
A noise gate cleans the audio when your voice drops below a threshold — killing background hum, HVAC noise, and keyboard clicks between sentences. It's one of the most impactful settings for clean audio.
- Set threshold just below speaking volume (usually -40dB to -50dB)
- Use a gentle attack/release to avoid unnatural cut-offs
- Test by recording silence — you should hear almost nothing
3. EQ (Cut Before You Boost)
EQ lets you shape the tonal character of your voice. The golden rule: always cut problematic frequencies before boosting the good ones. Boosting first amplifies problems you'll then have to fight.
- Apply a high-pass filter at 80-100Hz to remove low-end rumble
- Cut the muddy 200-400Hz range if your voice sounds boxy
- Gently boost 2-5kHz for presence and 8-12kHz for air
4. Compression
Compression tames the dynamic range of your voice so quiet moments aren't too soft and loud moments aren't jarring. It gives your audio a polished, consistent feel that screams professionalism.
- Start with a 3:1 ratio and a threshold around -18dB
- Use a medium attack (10-30ms) to let the transients through
- Aim for 5-6dB of gain reduction on your peaks
5. Loudness Normalization
Streaming platforms like Spotify and Apple Podcasts normalize audio to a target LUFS. If you don't master to that target, your show will sound quieter or louder compared to others in the feed.
- Target -16 LUFS for Spotify, -19 LUFS for Apple Podcasts
- Keep true peak below -1dB to avoid distortion on compressed streams
- Use a loudness meter plugin or PodUp's built-in audio export tool
Your listener decides in the first 10 seconds. Make those seconds count.
Putting It All Together
Great sound is a sign of respect for your listeners. When they press play, you are in their ears — it's an intimate experience. By taking 5 minutes to polish your audio, you remove the friction between your message and your audience. Every episode sounds professional, clear, and ready to compete with the top shows in your category.
Ready to Record Studio-Quality Audio?
PodUp's all-in-one platform handles the technical heavy lifting so you can focus on your content.